
Vision. Goals. Execution.
Imagine ending up with streamlined workflows, impeccable service, and exceeding client expectations—all while regaining that work-life balance you’ve been dreaming of. We’re laser-focused on tailoring our consulting services to your needs, whether it’s optimizing your tools, implementing new systems, or revolutionizing your entire workflow. With Comer Technology Group, technology becomes your greatest ally, propelling you towards unrivalled success.
Read the latest news and updates

CW Manage – Managing Work Type Usage
One of the biggest and most common issues we tend to see is improper usage and selection of work types. In another blog post we will dive into Work Types in a little more depth. However, in this post I wanted to give some insights into how to effectively setup your work types for easier auditing and visibility.
Create a new Default Work Type
We are going to create a new default work type in this process. Most implementations have “Support”, “Remote Support”, etc. as the default work type which sounds great in theory. However, if that is your default work type – auditing the work type usage and time entries can be quite cumbersome. By utilizing a new work type as our default, for example – “
MUST CHANGE”, we can easier see which time entries are incorrect because the work type has not been changed.
Go into Setup Tables. Set Category to “Time & Expense” and the table is “Work Type“.
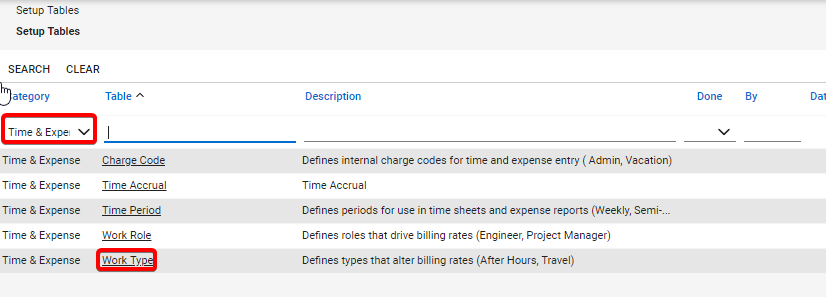
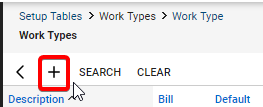
Select the “+” Sign to create a new “Work Type”.
Name the work type “-MUST CHANGE-“
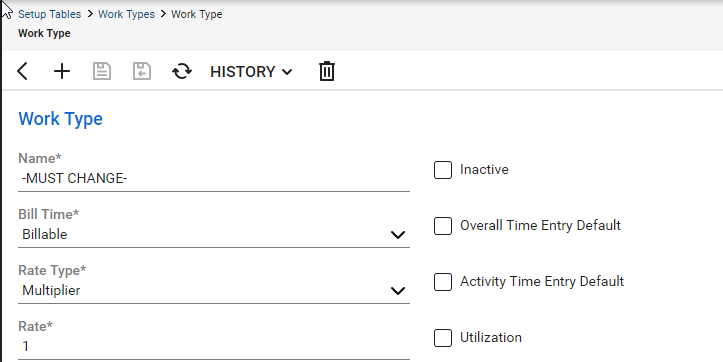
Configure the following settings:
Bill Time: Billable
Rate Type: Multiplier
Rate: 1
Overall Time Entry Default: Select this to make this the default Time Entry type.
Overrides can be managed in the following places:
Finance tab on a service ticket
Company Agreement Override on work type
Agreement Type Override on work type
Member screen – Default work type
Work Type setup table- Overall time or activity work type
Creating a Time Entry View for Auditing
After determining and setting how you want the defaults applied for this work type – one of the easiest ways to audit this on a regular basis is a “Time Entry Search”. To do so, we need to create a new view for our Time Entry Search screen.
Expand “Time & Expense” > Select “Time Entry Search“
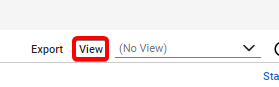
Click “View” > Click “+” to add a new View
We will name this “Work Type – Must Change“
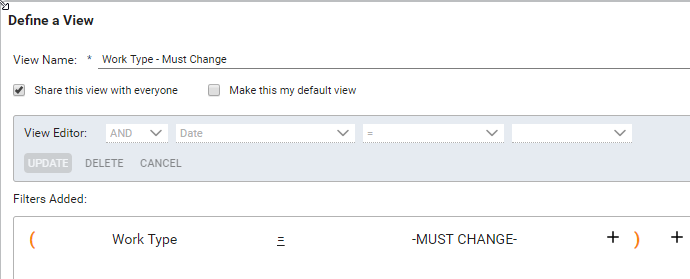
In the filters, select “Work Type” = “-Must Change-“
Determine if you want to share this view or set as your default.
Press Save.
Auditing Work Type Usage
Now we can audit our Work Type Usage. Now that the default view has been changed to “-Must Change-” we will know at a minimum that any time entries with that set as the work type are incorrect and need to be corrected.
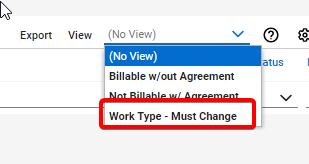
Expand “Time & Expense” > Click “Time Entry Search”
In the View dropdown > Select ” Work Type – Must Change”
Set your data parameters or any other filters
Press Search.
Voila! Now you can see the incorrect time entries.


Comer Technology Group provides exceptional business consulting services, management, and training in RMM and PSA – offering their service throughout all regions of the world.
Follow Us:

