
Vision. Goals. Execution.
Imagine ending up with streamlined workflows, impeccable service, and exceeding client expectations—all while regaining that work-life balance you’ve been dreaming of. We’re laser-focused on tailoring our consulting services to your needs, whether it’s optimizing your tools, implementing new systems, or revolutionizing your entire workflow. With Comer Technology Group, technology becomes your greatest ally, propelling you towards unrivalled success.
Read the latest news and updates

CW Manage – Tracking Vendor Escalations and Tickets
Over time I had noticed when vendors called in to us because we had escalated an issue to them or tickets were escalated/re-assigned to other techs -finding vendor information or ticket #s to reference was cumbersome or impossible. The vendor has their ticket #, we have ours, etc. So we worked out a way for Dispatch to easily track this and our engineers and have it displayed in a manner they didn’t need to go digging to find it through past notes or time entries.
Custom Fields – Setting the Stage
For this process, we are going to implement several custom fields. In my opinion, the three most important were the following: Vendor Ticket #, Vendor Name and a URL to a ticket portal (if available).
To implement these, follow these steps below.
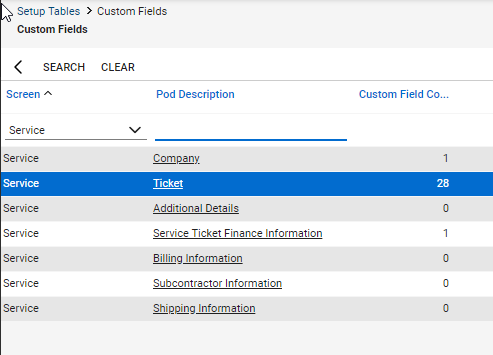
System > Setup Tables > General – Custom Fields
Under Screen, select Service > Ticket (Pod Description)
To follow our example, you will need to create the following fields:
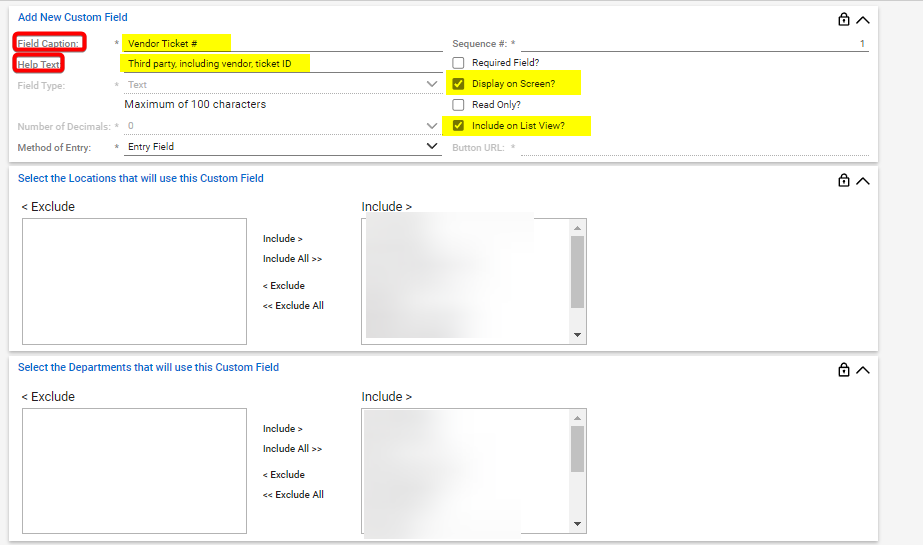
Field Caption: Vendor Ticket #
Field Type: Text
Display on Screen: Checked
Include on List View: Checked
Method of Entry: Entry Field
Field Caption: Vendor Name
Field Type: Text
Display on Screen: Checked
Include on List View: Checked
Method of Entry: Entry Field
Field Caption: Vendor Ticket Link
Field Type: Hyperlink
Display on Screen: Checked
Select the appropriate Location and Departments that you would like to be able to view these fields.
Making the Fields visible in List Views
Now that we have our fields, we need to make them visible. Custom Fields are not visible by default in list views.
Open Service Board/Service Ticket Search/Dispatch Portal
Next to View selection, click the Gear Icon

Go to Columns > Hidden Columns
Highlight and move each column over to Visible Columns. In this case, it will be “3P Ticket #” and “3P Vendor“
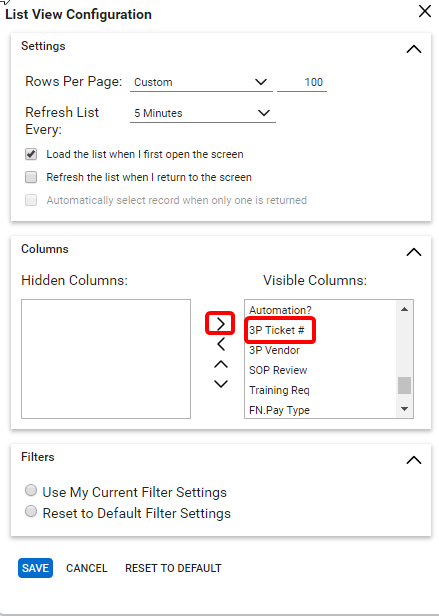
Press Save
You can re-arrange the column headers by left clicking on the column header and dragging it in the direction you would like. In our case, I moved them near the “base” ticket information (contact, company, etc.) so they could be seen quickly and easily at a glance of the ticket.

Filling out the Fields
Now you will see the fields in Service Tickets and you can fill them out as necessary. We modified our views in the Dispatch Portal, Service Board and the Service Ticket Search so that relevant parties could see this information.


Comer Technology Group provides exceptional business consulting services, management, and training in RMM and PSA – offering their service throughout all regions of the world.
Follow Us:

